 serin labs
HomeKit-Compatible Setup
This firmware is free and open-source. You flash it yourself, then follow these steps to connect it to WiFi and add it to Apple Home. An Apple Home Hub (Apple TV or HomePod) is required for remote access and automations.
Not certified by Apple: this is not an MFi-certified HomeKit accessory.
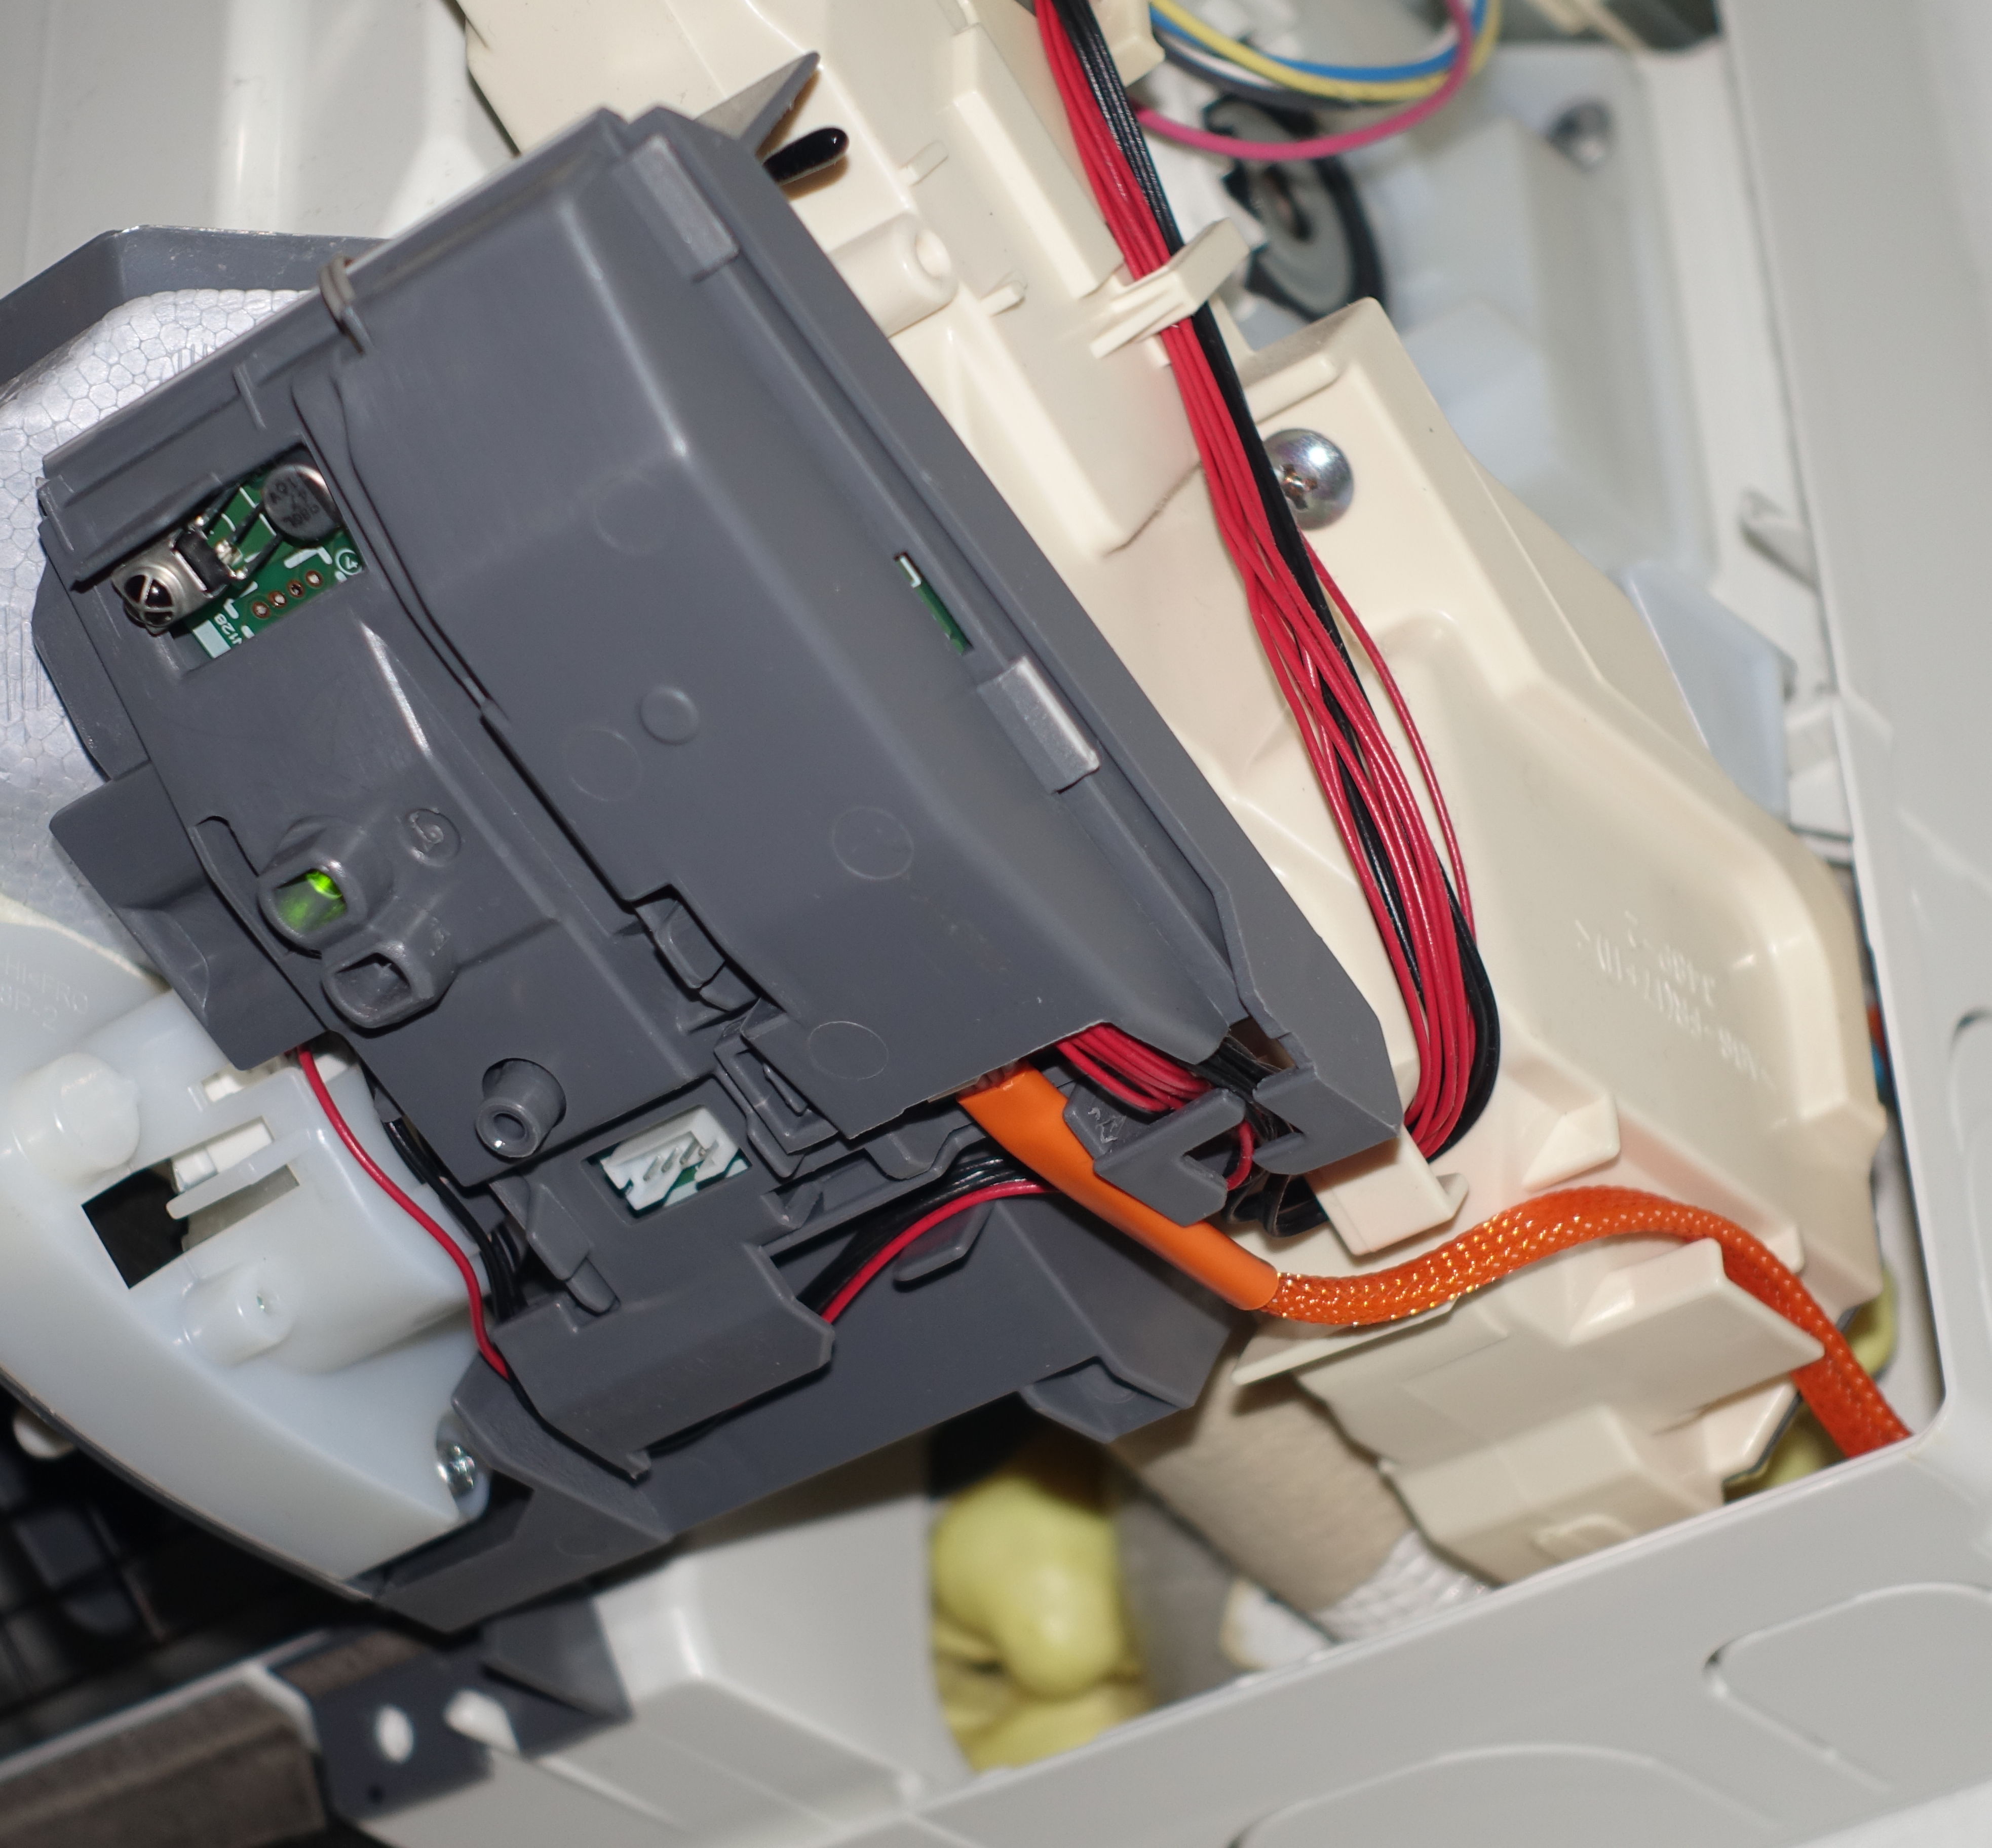
1. Connect to Your HVAC Unit
- Turn off power to your HVAC unit and open the cover to locate the CN105 connector (usually red, sometimes white).
- Plug the CN105 connector into the HVAC unit and Grove connector into the device.
- Place the device safely inside the unit if needed, reinstall the cover, and restore power.
Don't have the cable yet? Grab a ready-made CN105-to-Grove cable, assembled and tested, no crimping required.
2. Connect to WiFi
On first boot (or after 5 minutes without Wi-Fi), the device creates a Wi-Fi access point:
- Connect to the Serin-XXXX network (XXXX = last 4 characters of the device's WiFi address, password:
serinlabs). - A setup page opens. Enter your home WiFi name and password.
- If it doesn't open automatically, go to
http://192.168.4.1in a browser.
- If it doesn't open automatically, go to
- The device saves your credentials and reboots.
Connect over USB instead (Improv Serial)
On a computer using Chrome or Edge, plug the device in over USB to set up Wi-Fi straight from this page — pick your network, enter the password, done. No hotspot needed. (Not available on phones or in Safari/Firefox, which lack Web Serial.)
3. Add to Apple Home
Option A: Scan QR Code (recommended)
- In a browser, open the device's web UI at
http://Serin-XXXX.local(XXXX = the suffix from Step 2). If.localdoesn't resolve, usehttp://<device-ip>from your router. - Scan the QR code shown in the HomeKit panel with your iPhone or iPad.
Option B: Manual Setup Code
- Open the Home app on your iPhone or iPad.
- Tap + > Add Accessory.
- Tap More options… and select Mini Split XXXX.
- Enter the setup code shown in the web UI's HomeKit panel.
4. Access Web UI
The built-in web UI is reachable at http://Serin-XXXX.local or http://<device-ip>. It provides:
- Thermostat control (mode, temperature, fan speed)
- Vane control (vertical and wide vane positions)
- Diagnostics (compressor frequency, outside temp, error codes)
- Settings (device name, poll interval, temperature unit)
- Real-time log streaming
5. OTA Updates
Update firmware over the air without USB access:
- Check for Updates (easiest): In the web UI, open Settings > Firmware Update and tap Check for Updates. If a newer release is available, tap Install. The device downloads it, verifies the SHA256 checksum, and restarts. No manual download needed.
- Manual upload: Upload a firmware
.binin the same Firmware Update section. The browser verifies integrity before uploading. - Via curl:
idf.py build
curl --data-binary @build/mitsubishi-cn105-homekit.bin \
     -H "Content-Type: application/octet-stream" \
     http://<device-ip>/upload
After an OTA update, the device validates WiFi and UART communication before confirming the new firmware. If validation fails, it automatically rolls back.
6. Troubleshooting
WiFi Recovery
| Method | Details |
|---|---|
| Auto hotspot | The device creates a fallback hotspot after 5 minutes without WiFi. It turns off once WiFi reconnects. |
| Recovery page | Connect to the hotspot, then go to 192.168.4.1 to enter new WiFi credentials. |
| Button reset | Hold the board button for 10 seconds to erase stored WiFi credentials. |
Re-pairing
If you need to re-pair to Apple Home, open the web UI and use the "Reset Pairing" button in the HomeKit panel, then add the device again from the Home app.
For more troubleshooting tips, see the full troubleshooting guide.
Need Help?
Check the troubleshooting guide, browse Discussions for answers, or open an issue on GitHub.
Source Code
The HomeKit-compatible firmware is open source. See the GitHub repository for protocol documentation, project structure, and build instructions.
Disclaimer
This is an independent open-source project. It is not developed, endorsed, or certified by Apple Inc. or Mitsubishi Electric Corporation. Modifying HVAC systems may void warranties and carries risks. Proceed with care. This project is provided as-is, with no warranties or liability.